


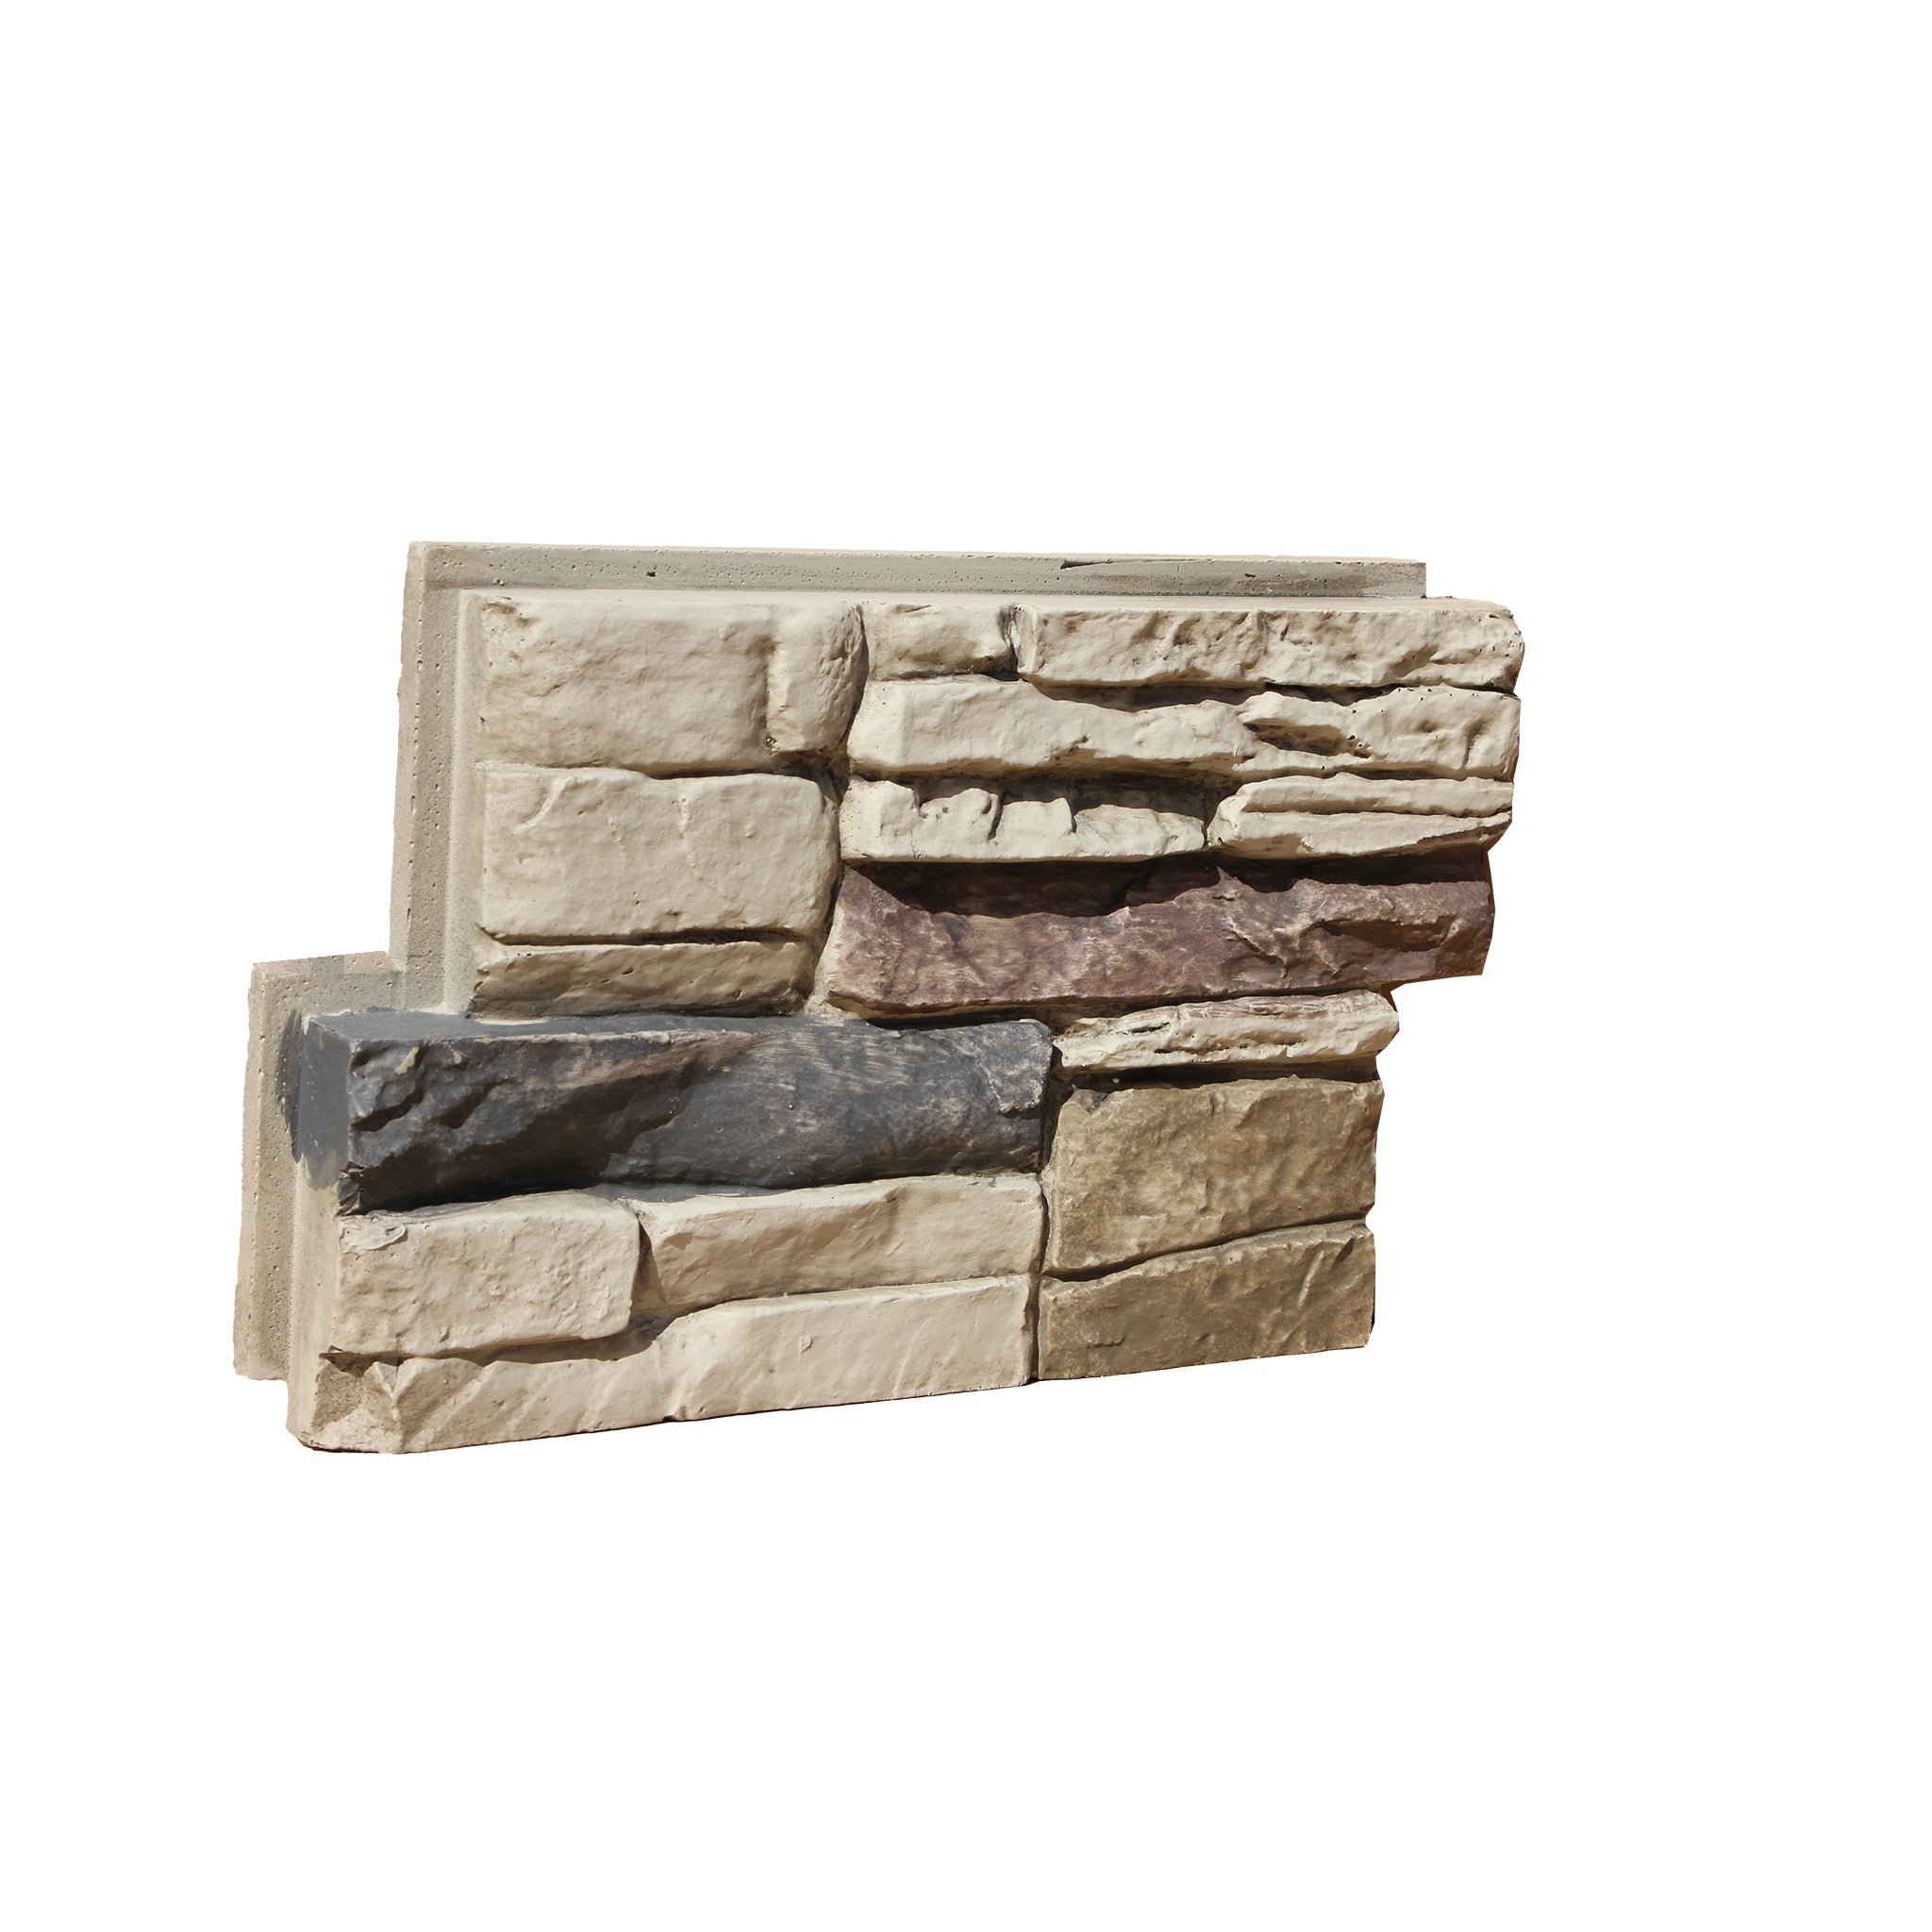
Installation - Panels
Stick - a - Stone
Installation Instructions
Peel, Stick, Done
Storage of Panels:
- Tritan BP Siding should be climatized for 24 hours prior to installation. If the siding panels have been stored in a cool climate or at room temperature, they can be installed immediately.
- Siding panels should be stored flat to prevent bowing. If in the unlikely event bowing occurs, place the panels flat and they will self-correct.
🛠️ Stick-A-Stone Installation Guide
Transform Your Walls in 4 Easy Steps
Ready to give your indoor space a stunning makeover? Installing Stick-A-Stone™ peel-and-stick wall panels is quick, simple, and mess-free – no special skills required. Whether you're updating a feature wall, fireplace, kitchen splashback, or outdoor patio, follow our easy guide below to get professional results every time.
🔧 What You'll Need:
- ✅Stick-A-Stone™ panels
- ✅Starter strip (strongly recommended for best alignment and a seamless finish)
- ✅Tape measure, spirit level, pencil
- ✅Cutting tool (e.g. handsaw or jigsaw)
- ✅Clean, dry cloth
- ✅Exterior-grade finishing nails (for outdoor installations)

🧱 Step-by-Step Installation Instructions
Step 1: Plan Your Project
- Measure your wall area (each box covers 5.36 square feet / 0.5 m²)
- Calculate how many boxes you'll need
- Start with the starter strip on the right edge of the wall
- 🔎 Pro Tip: The starter strip helps create a staggered brick look for a more natural, polished result.
- *Make sure your mounting surface is clean and free from dust and dirt.
Step 2: Start at the Bottom Right
- Begin at the bottom right corner of your wall
- Align your first panel using the starter strip
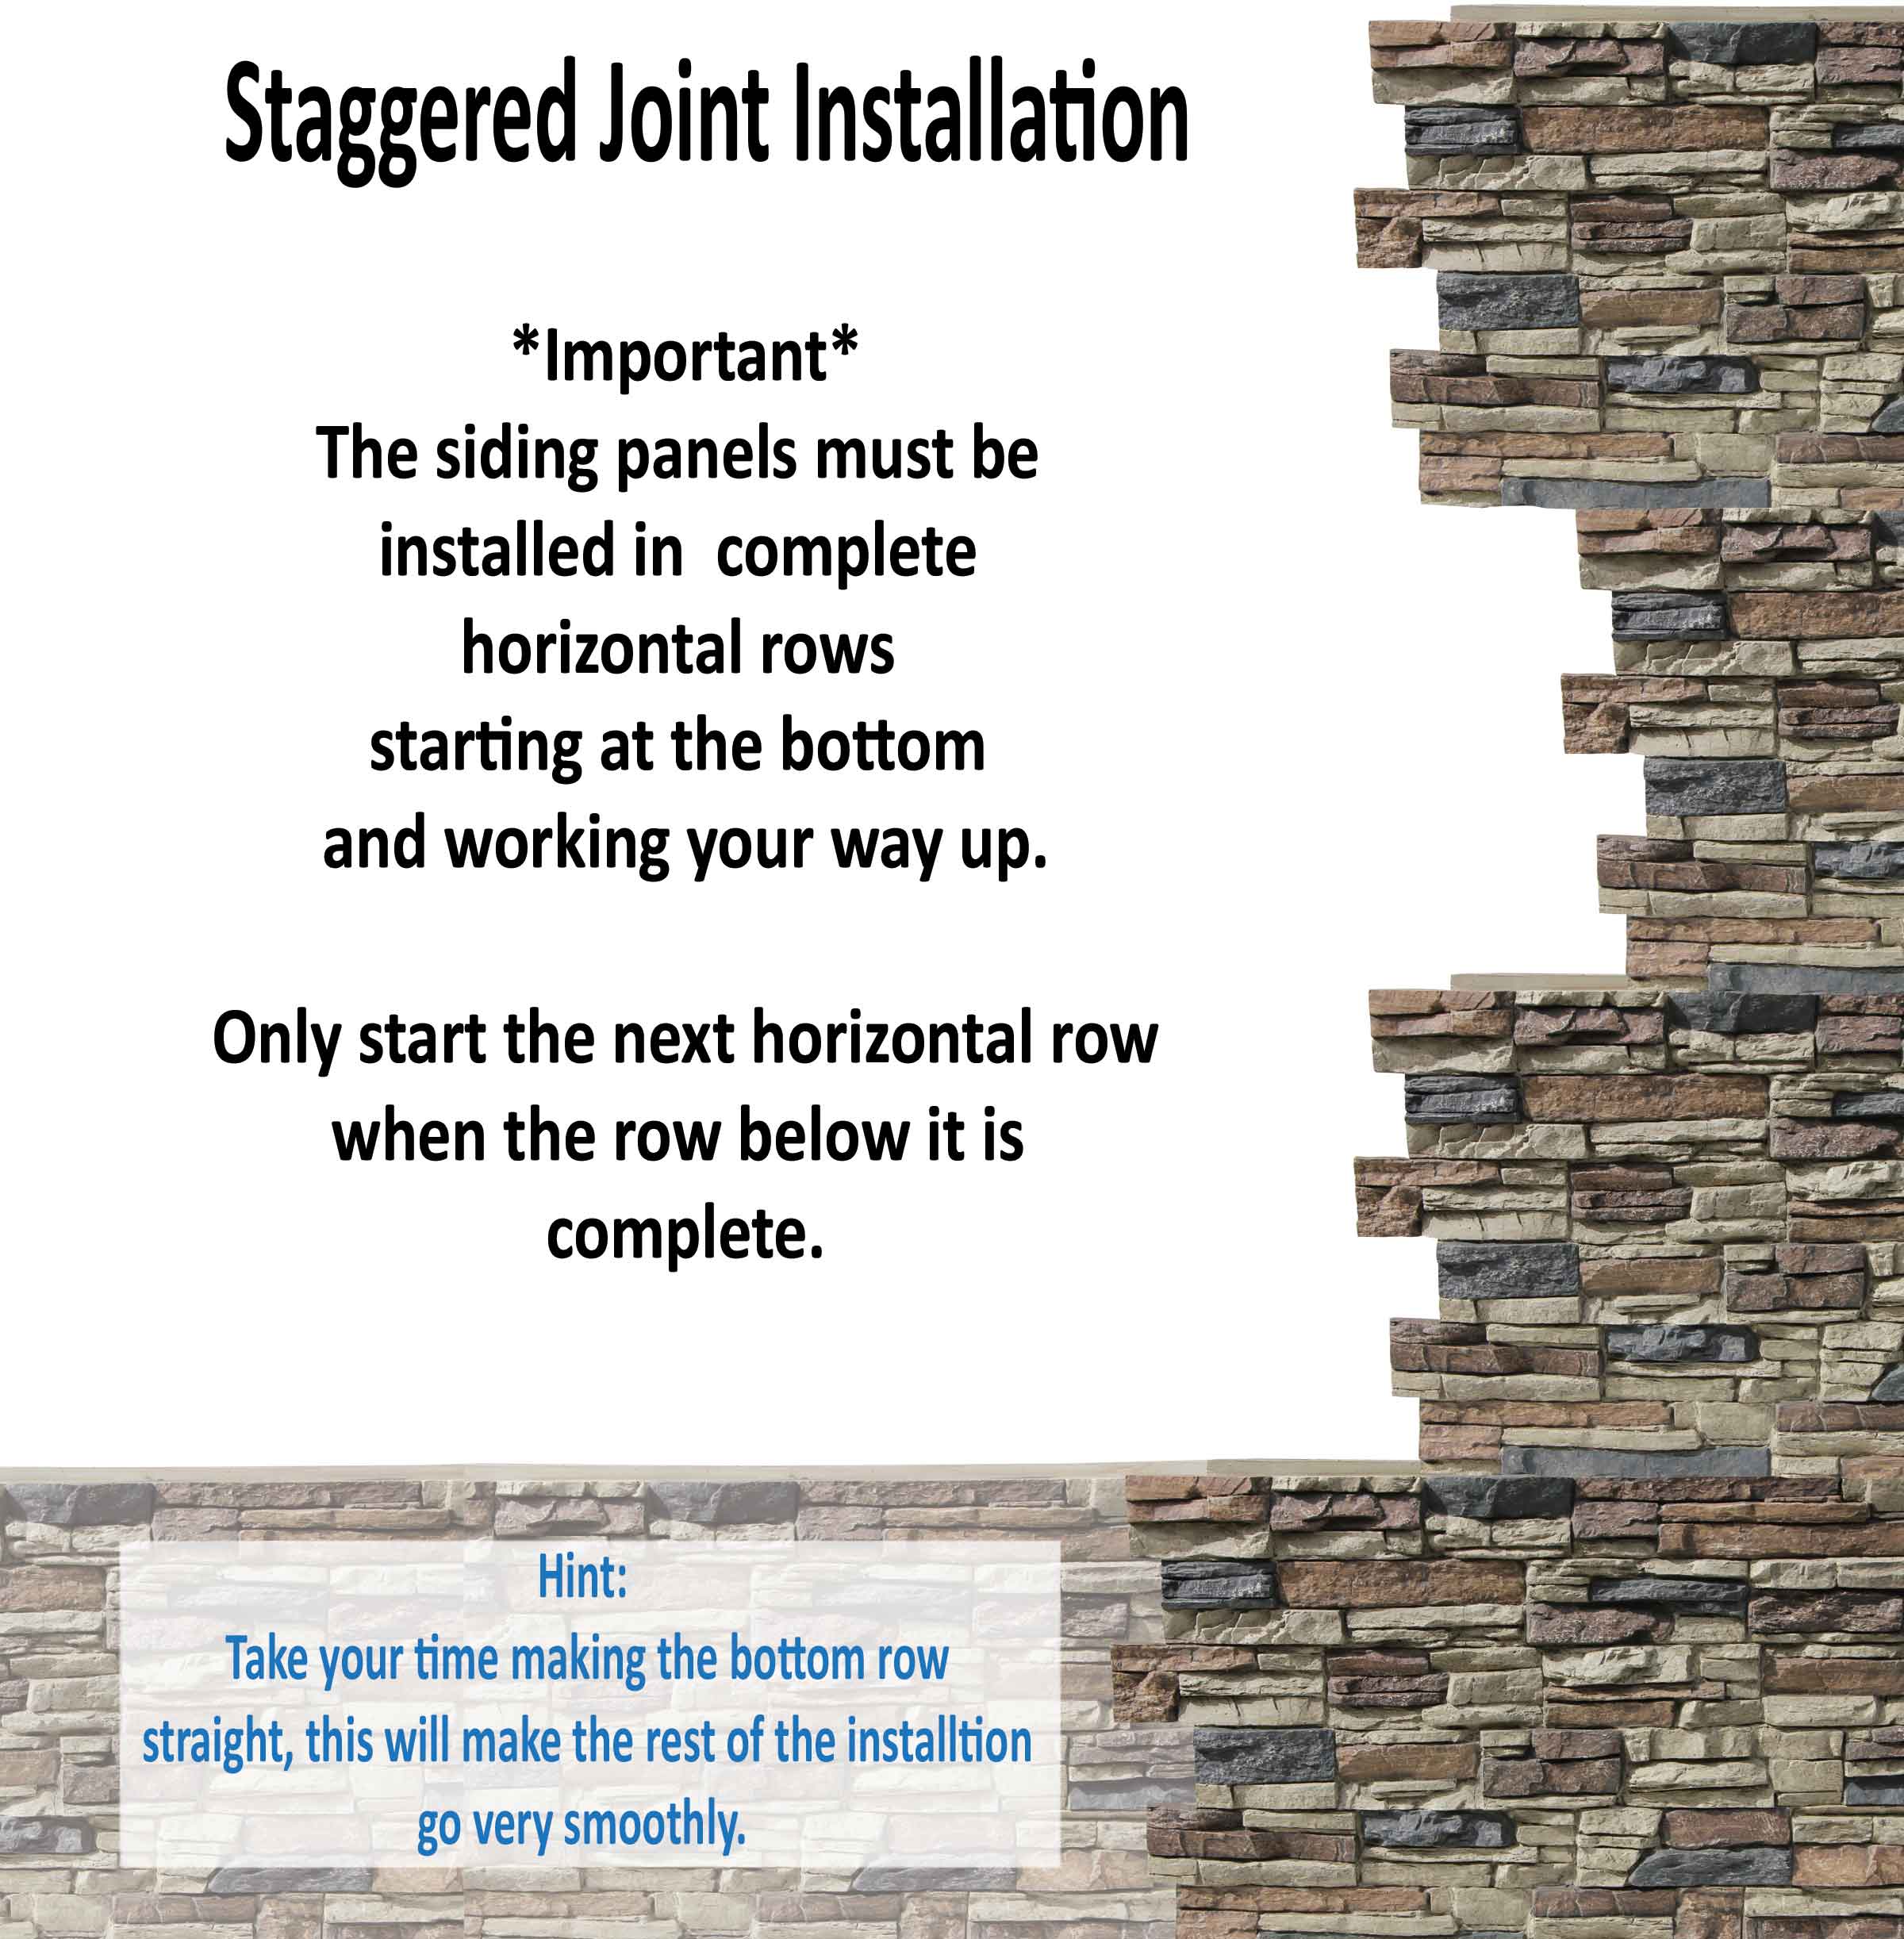
- Make sure the first row is perfectly level – this sets the tone for the rest of your project
- Work from right to left along the bottom row
Step 3: Peel, Stick, and Press
- Wipe your wall one last time to remove dust
- Peel the backing off the adhesive
- Align the panel with the starter strip or neighbouring panel
- Press firmly across the full panel to activate the adhesive
- Complete each row fully before moving up to the next
- Panels interlock on all four sides for a seamless finish
- 🔎 Pro Tip: For added holding strength—especially in high-traffic areas—add a few finishing nails after pressing the panels in place. You’ll get extra fastening without changing the appearance. It never hurts to overbuild.
Step 4: If Mitering The Panel.
- If you choose to miter the panels, we recommend applying adhesive to both cut edges and pressing them firmly together to ensure a strong bond. Use a product like Gorilla Heavy Duty Grab Adhesive or another polyurethane-compatible adhesive suitable for indoor and outdoor use.
Step 4: For Outdoor Installation
- Follow indoor steps 1–3
- After sticking, secure panels with exterior-grade nails to ensure long-lasting hold
- Make sure all edges are flush and firmly attached
- 💡 Pro Tip: For added durability and weather resistance, run a bead of exterior-grade adhesive along the perimeter of each panel—especially where it overlaps or interlocks with adjoining panels or the starter strip. This creates a moisture barrier that helps seal the joints and prevent water penetration.
- 👉 Important: Make sure the adhesive you use is compatible with polyurethane surfaces.
💡 Installation Success Tips:
- Always complete one row before moving to the next
- Keep your spirit level nearby and check often
- Apply even pressure across the panel
- Maintain a warm indoor temperature while installing
- Take your time – precision delivers perfection

Need Help? We're Here for You
📞 Call us: 01274 051363
📱 Text Us: 07441 920001
🌐 Visit: www.tritanbp.co.uk
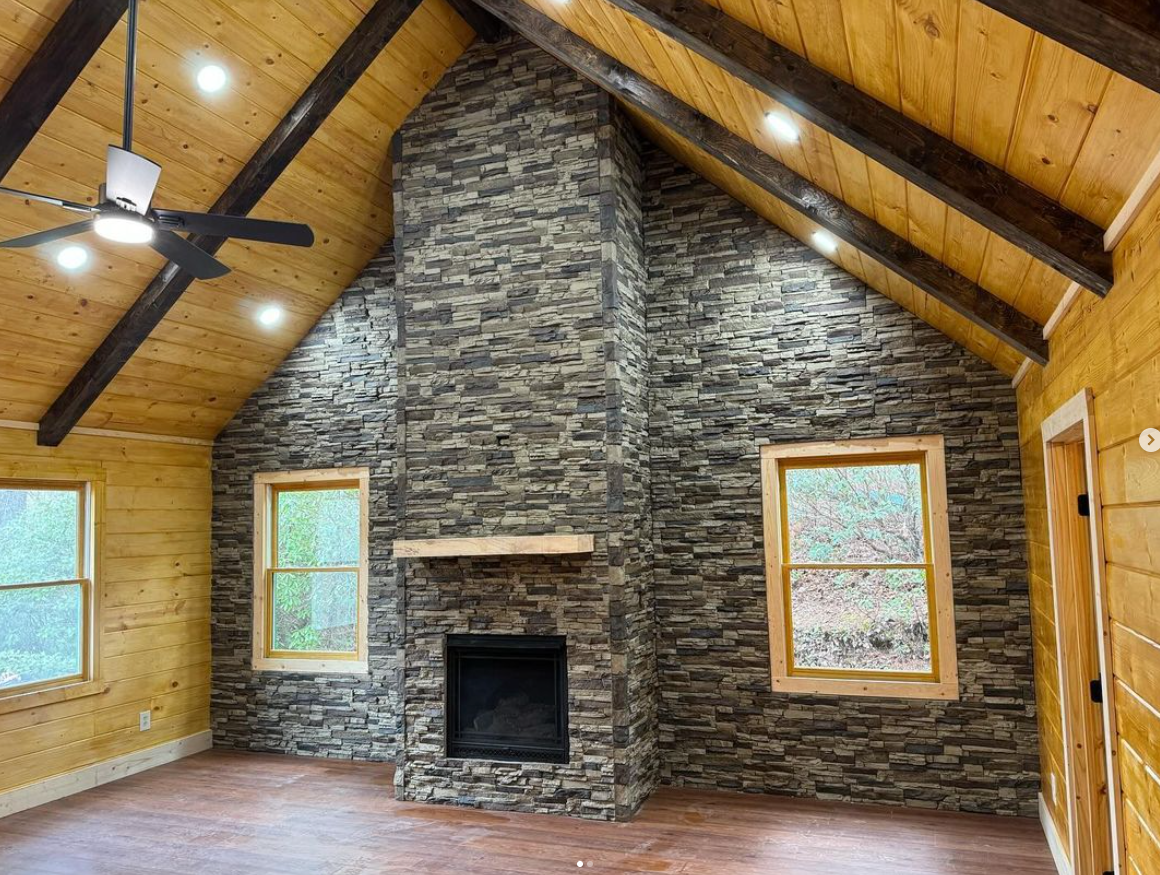
🌟 Stick-A-Stone™ – Luxury That Installs in Minutes
With Stick-A-Stone™, you don’t need a builder to get a beautiful finish. Whether indoors or outdoors, our peel-and-stick wall panels give you a luxurious stone look in a fraction of the time. Perfect for DIYers, renters, and homeowners anywhere.
